


 LED NEON SIGNS
  Custom Project
  FLAT CUT ACRYLIC
  METAL SIGN
  METAL CHANNEL LETTERS
  ACRYLIC CHANNEL LETTERS
  PVC FOAM SIGNS
  LIGHTBOX SIGN
  WAYFINDING SIGNS
  CUSTOM SCULPTURE
  Edge Neon Fixture
  Rigid Neon Sign – No Backing
  Rigid Neon Sign – With Backing
  Neon Channel Letters
  ProGrade LED Neon Channel Letters
 Edge Neon Fixture
Frequently asked Questions
How should I install the Edge Neon fixture?
Mount the Clips
Drill holes in the wall and secure the Edge Spring Mounting Clips.
- Use 2 clips for 4ft Edge Neon
- Use 3 clips for 8ft Edge Neon

Attach the Edge
Hook the L-shaped side of the clip into the back of the Edge, then press down until it snaps securely into place.


Install the Covers
Edge Joint Cover: Snap over connections between fixtures.


Edge Outside Corner Cover: Use for outward corners.


Edge Inside Corner Cover: Use for inward corners.


Finish Installation
Ensure all covers are firmly in place for a smooth, finished appearance.
What color options are available?
Can I order custom-cut lengths?
How do I properly finish and seal a custom-cut Edge Neon Fixture?
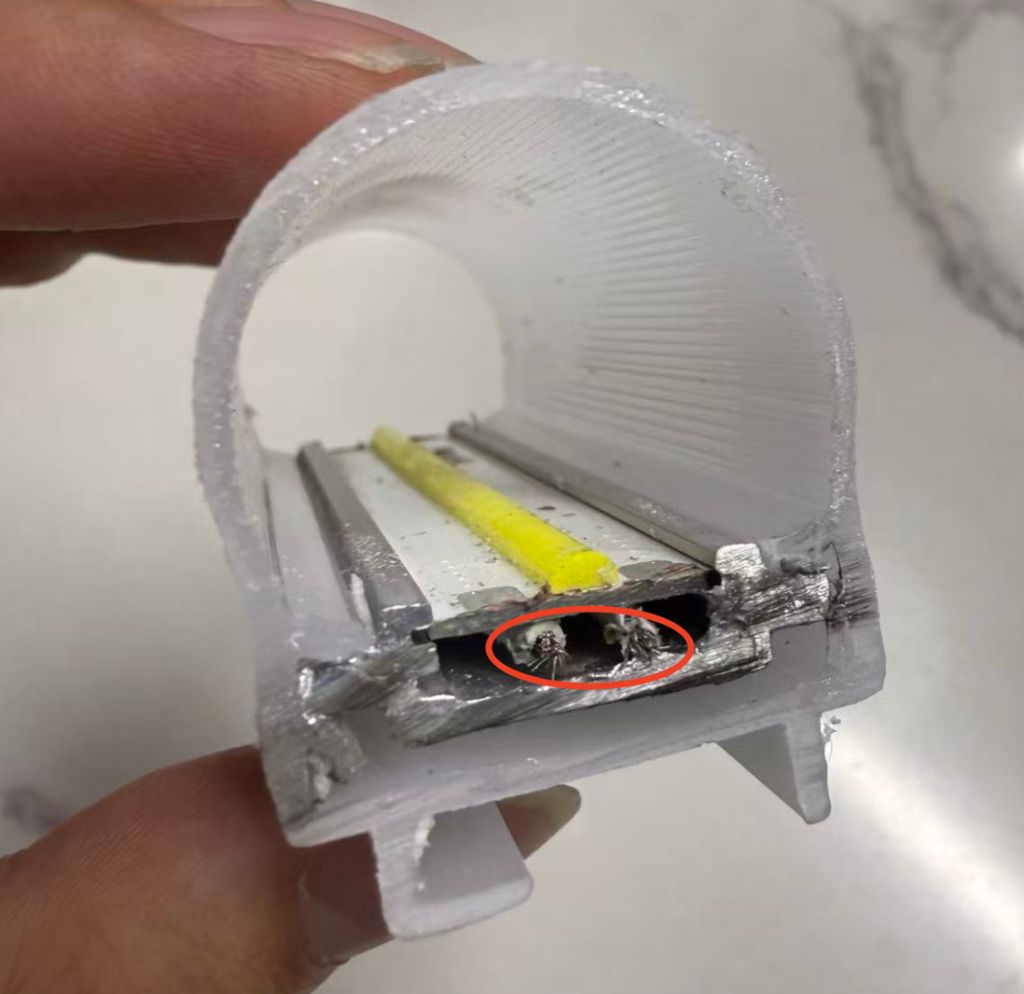
After trimming and soldering the positive and negative wires (or connecting them with wiring clips), apply fast-set glue evenly on the end cap, clamp it back onto the neon housing, and press firmly. Once the glue sets (about 30 seconds), run a layer of silicone around the end cap and the fixture to seal it.
If your cut lands right where the internal wires sit, gently separate the two wires with a small clip and add a bit of silicone between them for insulation and extra protection.
Watch the video tutorial:
Is the power supply included?
What are your shipping policies & lead times?
